June 07, 2024
In my last blog, I discussed managing dependencies with git submodules. However, when working with large projects that have many dependencies, traditional methods like git submodules can become cumbersome. Google’s repo tool emerges as a powerful solution specifically designed to handle this challenge.
What is repo tool?
repo is an in-house dependency management tool developed by Google. It excels at managing many dependencies, making it ideal for projects like the Android Open Source Project (AOSP) and custom Android ROMs.
Unlike git submodules, which are an integrated git feature, repo functions as a separate executable script. This necessitates installation before diving in.
Installation (Choose your adventure!)
Linux:
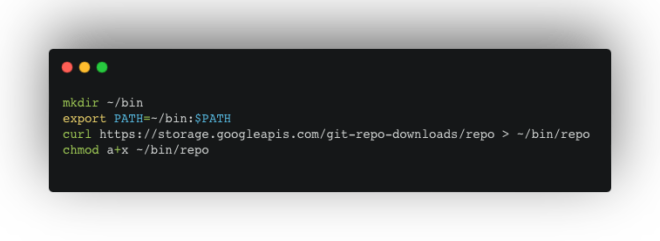
Create a directory for Repo:
mkdir ~/binUpdate your PATH environment variable:
export PATH=~/bin:$PATHDownload and make Repo executable:
curl https://storage.googleapis.com/git-repo-downloads/repo > ~/bin/repo
chmod a+x ~/bin/repo
OSX:
Use Homebrew to install Repo:
brew install repo
For other platforms, refer to official docs: https://gerrit.googlesource.com/git-repo
Manifest Magic: Defining Dependencies
Repo relies on a manifest file stored in a separate Git repository. This XML file is the central hub, outlining where to fetch project dependencies, their storage location, and specific revisions (commits).
The beauty of Repo lies in its ability to manage multiple manifests. Imagine a huge, complex project like the Android Operating system with 100 dependencies. You could create a dedicated “lib.xml” manifest to fetch those specific libraries, eliminating the need to include hundreds of unrelated dependencies from a broader manifest. Similarly, the testing and compliance team can have “qa.xml” and “compliance.xml” to manage extra QA and compliance-related dependencies separately, which might not be needed in production but required during development. Both could also have the same libraries but different versions. Hence repo using manifest.xml makes handling dependencies extremely flexible.
For this demo, we’ll keep things simple with a single “default.xml” file.
Creating a Manifest
Clone the Example Repository having our manifest:
git clone git@github.com:iayanpahwa/manifest-demo.gitExamine the default.xml file:
This file specifies the main Project (ex, EazyExit) with two dependencies, FastLED and PubSubClient, along with their corresponding URLs, paths, and revision IDs.
<?xml version="1.0" encoding="UTF-8"?>
<manifest>

<remote fetch="https://github.com/iayanpahwa/" name="EazyExit" />

    <project name="FastLED.git" path="lib/FastLED" remote="EazyExit" revision="c1ab8fa86f6d6ecbf40ab7f28b36116a3c931916" />
    <project name="pubsubclient.git" path="lib/PubSubClient" remote="EazyExit" revision="dddfffbe0c497073d960f3b9f83c8400dc8cad6d" />

</manifest>
Note: The manifest allows for various configurations, including project branches and alternative remotes (like Bitbucket or GitLab). Refer to the official documentation for a comprehensive list: https://gerrit.googlesource.com/git-repo/+/master/docs/manifest-format.md
Putting it All Together: Fetching Dependencies
- Push the default.xml file to your GitHub repository (if using the provided example).
- Create a project directory (e.g., EazyExit).
Navigate to your project directory and initialise Repo

3. This command establishes the current directory as your project workspace.
Fetch dependencies using the repo sync command:

4. This command retrieves all dependencies specified in the manifest and stores them according to the defined paths.
By leveraging repo, you can effectively manage many dependencies within a single, streamlined workflow.
Repo empowers you to manage complex dependencies with ease, promoting a more flexible and adaptable development process. Checkout our other blogs on:
Recent Posts

August 27, 2025
How to Find the Right Learning Path When You’re Switching to a Tech Career
See post

August 27, 2025
The Hidden Challenges in Software Development Projects: Key Insights from Our Latest Survey
See post

August 22, 2025
Developer News This Week: AI Speed Trap, GitHub Copilot Agents, iOS 26 Beta Updates & More (Aug 22, 2025)
See post